The Quick Selection Tool

This tool is used to “paint” certain parts of pictures using an adjustable round brush tip.
As you drag the quick selection tool over your image and it slowly selects the part of the image that you want to edit. Once selected, you can edit this part of the image however you wish by adjusting the exposure, brightness, contrast, vibrance, etc. Additionally, you can also delete the part of the picture that you have selected, for example, the background, then one subject of the picture can be edited out,
However, you can also create the “colour splash” effect this way by simply choosing the “Black and White” option on the Adjustments tab, then the part of the picture that is desired to be in colour.
This is useful because it can make a certain subject of the picture stand out as it is the main part of the picture that is edited, therefore it is an effective editing tool.
Type Tool

The type tool of the picture can allow you to type on whatever is being worked on in Photoshop. This can be on an image or a presentation, for example, a poster. This shows to be helpful as it means that it expands the use of Photoshop. All that needs to be done is to select the type tool and it will pop up on the image. Text can either be typed or copied and pasted. Once the text is there, the font, sized and whether you want the text to bold,italic, underlined, etc. can be changed.

However, the type tool can look effective on a picture because it could be used for certain types of branding or logo making. Personally, I would use this type of tool if I were to make any more posters or logos as it proves to be very useful.
Patch Tool
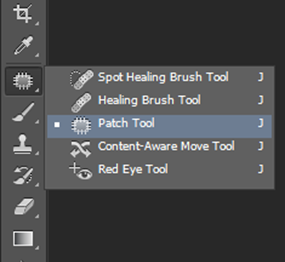
Firstly, when selecting the Spot Healing tool, the Patch tool will come up. Once it is selected, drag a marquee around the area that you want to patch up. The tool clones the selected area while you drag it to the damaged area When releasing the mouse button the tool blends in the source selection and repairs the desired area.
This tool is useful because it is and easy way of repairing parts of a picture and it does not completely obvious. I would personally use it for portrait shots, to get rid of any blemishes to make the image have a more finished look.
Blur Tool

Once the image has been opened, select the blur tool. Then select a brush from the Brush Preset Picker on the larger Brush panel. Select a blending mode from the Mode pop- up menu, then adjust the strength of the blurring effect with the Strength Slider or text box.
Now paint all over the areas that you want to blur.
Once again, I find this tool useful as it can make certain parts of an image stand out. For example, for the Challenge days pictures, it would be a good tool to use for portraits to blur out the background and keep the face focused, which I believe makes the image look more professional.
Dodge Tool
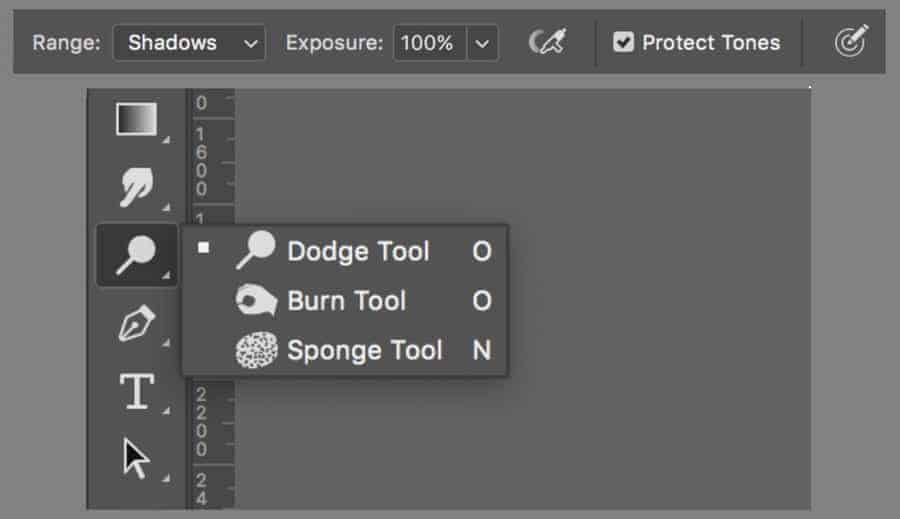
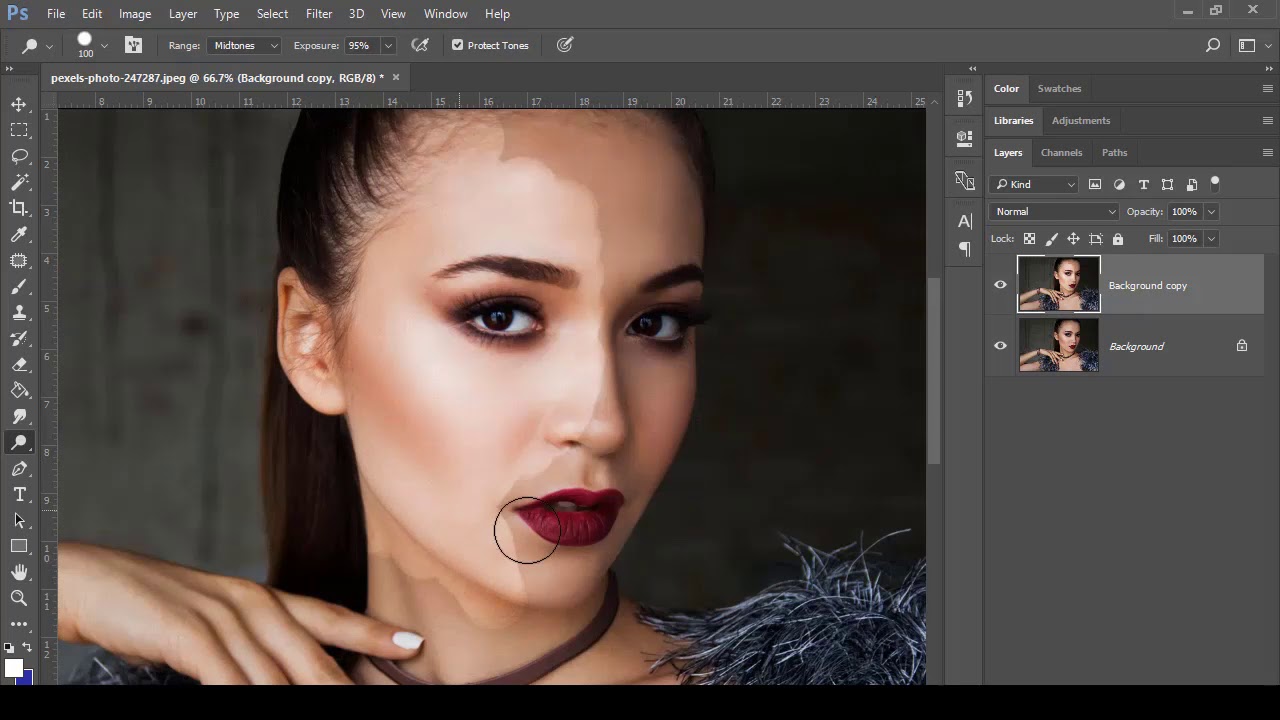
This tool works alongside the burn tool and makes an image lighter or darker depending on the area selected. This can be especially useful for portraits as you are able to choose which parts of an image you want to lighten or darken.
